This is the most delicious homemade cherry pie I’ve made. You can use sweet or sour cherries, and the pie filling really couldn’t be easier. All you need to do is mix, fill, and bake!
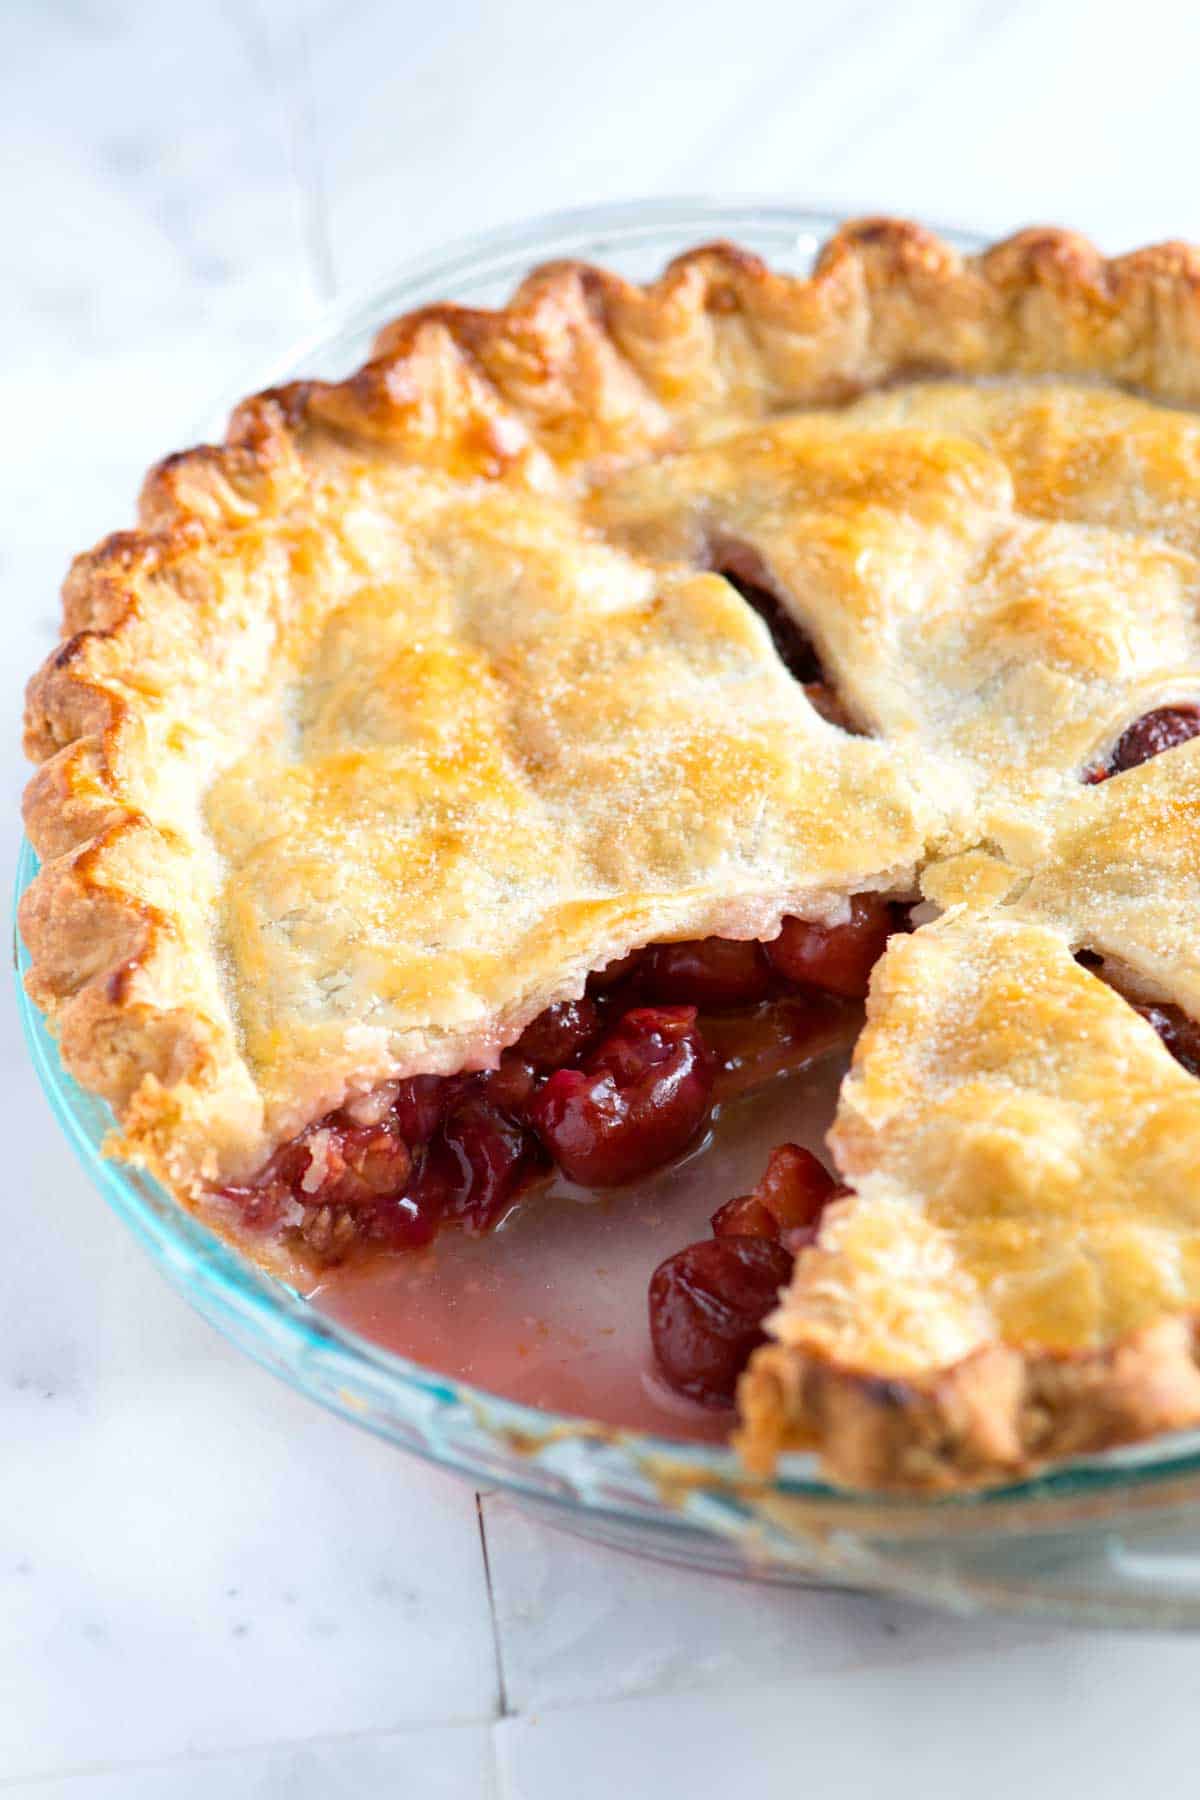
My family loves this homemade cherry pie! When cherries come into season, we jump at the chance to make it. I love this homemade pie with fresh cherries.
I’ve made this cherry pie recipe with sweet and sour cherries and plan to make it soon with a mixture of both!
Key Ingredients
- Pie crust: You can use homemade or store-bought pastry. I use my favorite homemade pie crust recipe to make this cherry pie. It’s made with butter and hasn’t failed me yet.
- Cherries: I love fresh cherries for this pie. You can use sweet cherries or tart cherries. If you use sour cherries, consider increasing the sugar in the filling. I have provided tips in the recipe below, where you will also see my tips for using frozen and canned cherries in this pie.
- Sugar: I use granulated sugar in the cherry pie filling, but brown sugar would be fine. If you have tart cherries, increase the sugar. I’ve included tips for how much below the recipe.
- Lemon, vanilla, and almond extract: I love the combination of flavors in this cherry pie! Cherry and vanilla is such an amazing combination, and when you add the almond and lemon, it gets even better!
- Cornstarch: We need cornstarch to thicken the pie filling. Although some recipes call for flour, cornstarch worked best in our testing.
- Butter: A tiny bit of butter makes the filling shiny and extra delicious.
- Egg yolk and cream: We whisk them together for our egg wash, which we brush over the crust. As the pie bakes, the egg and cream make the crust turn golden and shiny.
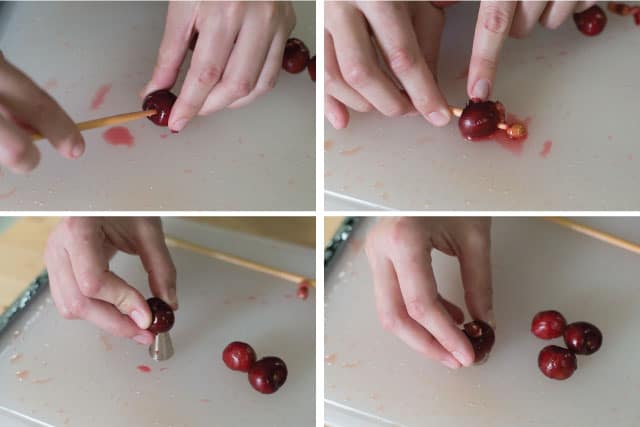
How to Pit Cherries Without a Cherry Pitter
If you don’t have a cherry pitter, don’t worry. I’ve got two ways to pit cherries without one. First, you can use a chopstick, using the thicker end to push the pit out of each cherry. The second option is to use a small piping tip. Place it on the work surface, then push the cherry down onto the tip (the pit pops right out).
How to Make Homemade Cherry Pie
I recommend starting with my all-butter pie crust to make this cherry pie. Once you’ve got your pie dough made, you’ll need to roll it out. We’ll use half of the dough for the bottom crust and half for the top of our pie.
My favorite cherry pie filling is simple! We toss cherries with sugar, cornstarch, lemon juice, vanilla, almond extract, and salt. Then, I set the bowl aside so the sugar starts working on the cherries to extract some liquid.
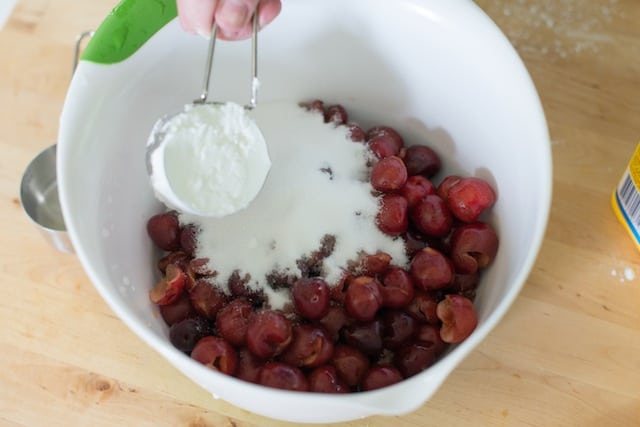
I spoon the cherries into my pie crust but leave most of the liquid pooled at the bottom of the bowl, which might seem strange, but adding too much liquid to our pie makes it soggy. Straining your cherry pie filling is a great trick to ensure the filling sets well after baking and cooling.
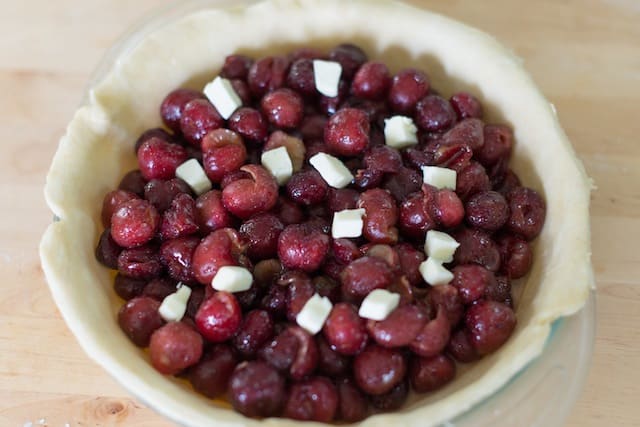
The filling in this cherry pie bakes and cools to be slightly set (not super thick and set). Check the tips section for my recommendations if you prefer a thicker, more set pie. For thicker filling, you’ll take one more step before baking your pie and reduce the liquid on the stove before pouring into the pie with the strained cherries.
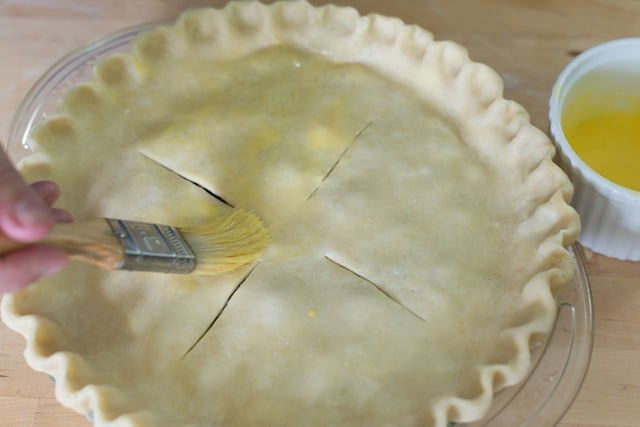
After adding our top crust, I make 3 to 4 slits in the top so that steam can escape, and then bake until the filling is bubbly, shiny, and thickened. Then we wait. Homemade cherry pie must cool completely before slicing. Otherwise, the filling will be too runny.
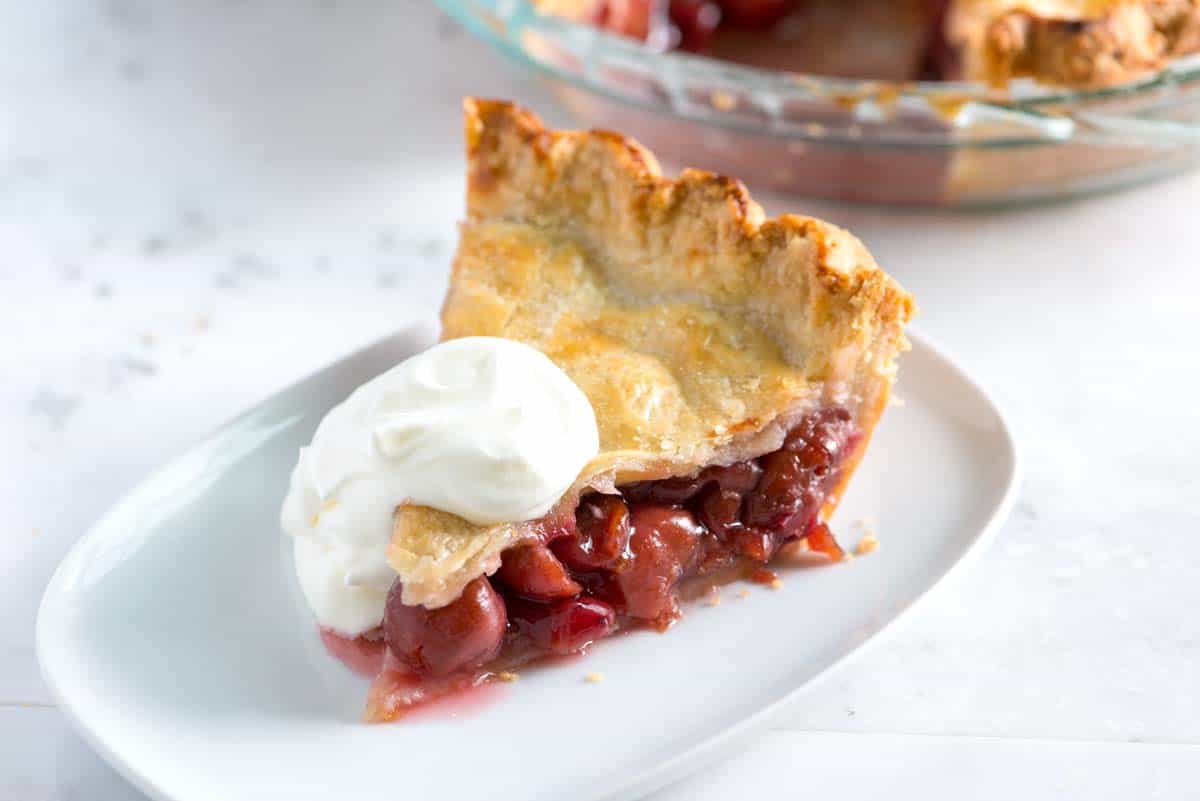
Best Homemade Cherry Pie
- PREP
- COOK
- TOTAL
My favorite cherry pie recipe is easy! You need a little patience when pitting the cherries, but I promise it’s worth it. You can use sweet cherries, sour cherries, or a combination of both.
Watch Us Make the Recipe
You Will Need
1 (9 inch) double crust homemade pie crust, our recipe makes enough for 2 single crust pies
2 ½ pounds (1300g) whole fresh cherries, about 5 cups pitted
2/3 cup (130g) granulated sugar, plus more for top
1/4 cup (30g) cornstarch
1 tablespoon lemon juice
1 ¼ teaspoon vanilla extract
1/4 teaspoon almond extract
1/8 teaspoon salt
1 tablespoon cold unsalted butter, cut into small squares
1 egg yolk
1 tablespoon heavy cream
Directions
- Prepare Bottom Crust
1Roll out half of the pie dough to fit a 9-inch pie dish (keep the remaining dough chilled). To prevent sticking, sprinkle flour on your work surface and rolling pin. Roll from the center outwards for even thickness, lifting and rotating the dough by a quarter turn as you go. Check the size by inverting the pie dish over the dough (it should be about 2 inches larger).
2Carefully place the dough into the pie dish without stretching it, and trim the edges to within 1 inch of the dish. Refrigerate while you prepare your filling.
- Make Pie Filling
1Pit the cherries and cut them in half. Then, cut half of the mixture into quarters (the variation of sizes makes a better filling).
2Add pitted cherries to a large bowl, then add the sugar, cornstarch, vanilla extract, almond extract, lemon juice, and salt. Gently toss to combine. Set aside.
3In a large bowl, combine the pitted cherries, sugar, cornstarch, vanilla, almond, lemon juice, and salt. Give it a gentle toss, then set aside on the counter while you roll the top crust.
- Assemble the Pie
1Roll out the remaining dough to a 12-inch round on a lightly floured surface. If the dough sticks to the surface, add more flour.
2Spoon cherry pie filling into the prepared pie crust, but leave most of the liquid pooled at the bottom of the bowl (it makes the pie soggy). Scatter the little squares of cold butter over the filling.
3Carefully place the top round of dough over the filling. Use a knife or pair of kitchen scissors to trim dough to within 1 inch of the edge of the dish.
4Fold the edges of the top crust underneath the edges of the bottom crust, pressing the edge to seal it to create a thicker, 1/4-inch border that rests on the lip of the pie dish. Crimp the edges as desired.
5Whisk the egg yolk and cream to create an egg wash, then brush it over the crust. Sprinkle with extra sugar and refrigerate the pie for 10 minutes before baking.
6Cut 3 to 4 slits through the top pie crust to let steam escape in the oven.
- Bake Pie
1Before baking, position an oven rack in the lower third of the oven and place a baking sheet on it. This will catch any potential drips from the pie. Preheat the oven to 400°F (204°C).
2Place the pie on the hot baking sheet and bake for 20 minutes. Then, reduce the oven temperature to 350°F (177°C) and continue baking for another 35 to 45 minutes. The pie is done when the crust is golden brown and the filling is bubbling enthusiastically.
3If you notice the crust edges browning too quickly, cover them with aluminum foil and continue baking until the pie is fully cooked.
4Allow the pie to cool for 3 to 4 hours before cutting for the best results (this gives the filling time to thicken and set properly).
Adam and Joanne's Tips
- Storing: Homemade cherry pie lasts up to 2 days, covered on the counter or in the fridge for up to 5 days. For the best results, wrap the pie with plastic wrap or store it in an airtight container. Baked cherry pie can be frozen for up to 3 months when wrapped tightly in plastic wrap and aluminum foil. Thaw overnight in the fridge.
- Cherries: I prefer this pie with fresh cherries. If you use frozen cherries, thaw them first, and drain of extra liquid. I highly recommend using fresh cherries, but you can use 4 cups of canned or bottled cherries, drained with about 1/3 cup of cherry juice reserved for adding to the cherry filling.
- Don’t have a cherry pitter? Push the pit out with the blunt end of a chopstick, or press the cherry down onto a piping tip.
- Sugar: Feel free to add more sugar if your cherries are more tart. 2/3 cup (135g) is perfect for sweet cherries. You can increase to 3/4 cup (150g) or more for tart or sour cherries.
- Thicker filling: As written, our cherry pie filling is slightly loose (I love it this way). For a thicker filling, use a slotted spoon when adding the cherries to the pie crust, allowing excess liquid to remain in the bowl. Next, pour the leftover liquid into a small saucepan and cook over low heat for 3 to 4 minutes until reduced. Cool for 5 minutes, then pour over the cherries in your pie. Give them a gentle toss, then add the top crust and bake as directed in the recipe.
- The nutrition facts provided below are estimates.



Goooooood pie! We picked the cherries fresh from a grower in out area. The pie turn out great
Just mage it and it is perfect, wish I could share a picture. If you quarter the cheeries you need 5 cups
My daughter was craving cherry pie and since I loved it I tried this recipe. Her first bite she made a face n wanted to know what was wrong with it. I tasted it and realized it was the almond extract. It didn’t ruin it but no one else wanted theirs after the 1st bite. I ate almost the whole thing but, u can tell it’s there.
Hi Kim, Almond extract is pretty strong (which is why we only add a little bit). That said, it sounds like your family would just prefer it without. The great news is that you can easily make this pie without it! Hope you try it again soon 🙂
My daughter requested cherry pie for her birthday and this is the recipe we used. It was so delicious!! It was also super easy. I have never made cherry pie but wow, I will again!
I made this pie for Xmas with sour cherries from our own tree, so I added some sugar as suggested. I also thickened the juice to add to the fruit in the pie. I froze the pie before baking. It was excellent and everyone enjoyed my pie. I’ll make it again next year — when we have cherries again.
I had dried cherries so i boiled to rehydrate. I dont know if it needed more sugar or if the dried cherries madebit more tart. But it was still good with some vanilla ice cream!
Can I freeze it? If yes, cooked or uncooked? How would you wrap for the freezer?
Hi Elisa, Yes, you can freeze this pie, either as a whole pie wrapped in foil or as individual slices. Thaw them overnight in the fridge before reheating. Note that the crust may soak up extra moisture as it thaws so it will not be as flaky on the bottom as it would be fresh.
I made a lot of mistakes when making this pie. Like using an aluminum pan that was to big, using canned cherries, and I accidentally put the egg yolk and cream in the pie before realizing it just went on top lol! But it still turned out INCREDIBLE!!! Such a great pie!!!!!
lol…love that it still worked out 🙂
Your baking instructions differ from video. In video, you do not put pie on hot baking sheet in oven, or on bottom oven rack.
Hi Dave, this recipe has been updated with extra tips for success.
I made Cherry pie along with your basic pie crust butter recipe. The crust was delicious. The cherries where delicious. I followed the recipe to a tee. When I cut a piece of the pie I had a whole lot of cherries roll out. The cherries did not gel. I did not cut it until the next day. Why did the cherries not gel together?
Hi there, it is really important that the filling cooks until it is bubbling inside. Did this happen? Some cherries always fall out for me, too, but the filling should still thicken nicely.
Abosolutely wonderful recipe. I used sour cherries. Didn’t use almond extract because several people in my family have allergies. DELICIOUS!!!!!
Thank you so much for coming back to leave such a kind review 🙂
Very good pie. Used my own pie crust, 4 cups frozen cherries, thawed, forgot to add the 1/3 c juice, and didn’t refrigerate pie before baking. Still came out great.
Thanks for coming back, Gail!
i made this for christmas it tastes so good
So happy you enjoyed it!
I’m so excited to make this recipe. Thank you